目录
- 安装应用
- Demo
- 第一步:引入依赖
- 第二步:配置文件
- 第三步:创建模板
- 第四步:写代码
- 第五步:启动测试
- 总结
说明:业务中有时会有将系统数据写入到PDF文件中,生成一份报告文件的场景,本文介绍如何实现。
安装应用
在写代码前,先安装一个生成PDF的工具,是开源的,在 github 上,地址:
https://github.com/wkhtmltopdf/wkhtmltopdf/releases
我在 Windows 系统上演示,就下载下面这个版本,后面部署测试/线上环境也可以下对应的版本,在服务器上部署。

下载下来后,如下,是一个可执行程序

双击安装

安装到系统上一个没有中文,没有空格的路径下

Demo
写一个 demo,创建一个 Maven 项目
第一步:引入依赖
引入相关依赖,继承 Spring boot,pom.XML 如下:
<?xml version="1.0" encoding="UTF-8"?>
<project xmlns="http://maven.apache.org/POM/4.0.0"
         xmlns:xsi="http://www.w3.org/2001/XMLSchema-instance"
         xsi:schemaLocation="http://maven.apache.org/POM/4.0.0 http://maven.apache.org/xsd/maven-4.0.0.xsd">
    <modelVersion>4.0.0</modelVersion>

    <parent>
        <groupId>org.springframework.boot</groupId>
        <artifactId>spring-boot-starter-parent</artifactId>
        <version>2.7.12</version>
        <relativePath/>
    </parent>

    <groupId>com.hezy</groupId>
    <artifactId>pdf_demo</artifactId>
    <version>1.0-SNAPSHOT</version>

    <properties>
        <maven.compiler.source>8</maven.compiler.source>
        <maven.compiler.target>8</maven.compiler.target>
        <project.build.sourceEncoding>UTF-8</project.build.sourceEncoding>
    </properties>

    <dependencies>
        <!-- web依赖,用调用接口的方式来测试 -->
        <dependency>
            <groupId>org.springframework.boot</groupId>
            <artifactId>spring-boot-starter-web</artifactId>
        </dependency>

        <!-- 生成pdf依赖 -->
        <dependency>
            <groupId>org.springframework.boot</groupId>
            <artifactId>spring-boot-starter-thymeleaf</artifactId>
        </dependency>
        <dependency>
            <groupId>com.github.jhonnymertz</groupId>
            <artifactId>Java-wkhtmltopdf-wrapper</artifactId>
            <version>1.3.1-RELEASE</version>
        </dependency>

        <!-- lombok依赖 -->
        <dependency>
            <groupId>org.projectlombok</groupId>
            <artifactId>lombok</artifactId>
        </dependency>
    </dependencies>

    <!-- 编译插件,定义编译语言,后面用于构建PDF文件byte[],返回给前端 -->
    <build>
        <plugins>
            <plugin>
                <groupId>org.apache.maven.plugins</groupId>
                <artifactId>maven-compiler-plugin</artifactId>
                <configuration>
                    <source>17</source>
                    <target>17</target>
                </configuration>
            </plugin>
        </plugins>
    </build>
</project>
需要注意的是,spring-boot-starter-thymeleaf 不要指定版本,不然会报启动错误,详细看下面:
启动项目,报下面这个异常
Error starting ApplicationContext. To display the conditions report re-run your application with 'debug' enabled.
2025-10-23 22:28:23.811 ERROR 11536 --- [           main] o.s.b.d.LoggingFailureAnalysisReporter   :

***************************
APPLICATION FAILED TO START
***************************

Description:

A component required a bean of type 'org.thymeleaf.Twww.devze.comemplateEngine' that could not be found.


Action:

Consider defining a bean of type 'org.thymeleaf.TemplateEngine' in your configuration.
as follows:

解决
thymeleaf 版本与 Spring Boot 版本不匹配
不要指定thymeleaf 版本,让它用 Spring Boot 指定的
通过下面的步骤,可以查看 Spring Boot 管理的依赖版本
第二步:配置文件
添加相关配置到 application.yml 中,如下:
spring:
  thymeleaf:
    prefix: classpath:/template/
    suffix: .html
    mode: HTML
    cache: false  # 关闭缓存
  wkhtmltopdf:
    exec: D:\dev\wkhtmltopdf\bin\wkhtmltopdf.exe
这里面定义了后面 PDF 填充的模板(静态资源)的路径,和前面下载的 PDF 转换工具在系统中的安装路径。
第三步:创建模板
创建一个 PDF 填充模板,内容如下,填充数据用 ${对象名.属性名} 占位,语法应该和 FreeMaker 差不多
<!DOCTYPE html>
<html lang="zh-CN">
<head>
    <meta charset="UTF-8">
    <title>${data.title}</title>
</head>
<body>
<div>姓名:</div> <div th:text="${data.name}"></div>
<div>年龄:</div> <div th:text="${data.age}"></div>
<div>性别:</div> <div th:text="${data.sex}"></div>
</body>
</html>
页面打开如下:

注意一下模板所在位置,需要和前面配置文件中指定的保持一致
第四步:写代码
写一个接口,接口 做两件事,1)组装 PDF 中所需要的数据;2)合成 PDF 文件,返回前端
(Controller)
import com.hezy.service.PDFService;
import org.springframework.http.HttpHeaders;
import org.springframework.http.MediaType;
import org.springframework.http.ResponseEntity;
import org.springframework.web.bind.annotation.PostMapping;
www.devze.comimport org.springframework.web.bindandroid.annotation.RestController;

import javax.annotation.Resource;
import java.net.URLEncoder;
import java.nio.charset.StandardCharsets;

@RestController
public class PDFController {

    @Resource
    private PDFService pdfService;

    @PostMapping("/pdf")
    public byte[] pdf() {
        // 构建响应头
        String fileName = "example.pdf";
        String encodedFileName = URLEncoder.encode(fileName, StandardCharsets.UTF_8);
        HttpHeaders headers = new HttpHeaders();
        headers.setContentType(MediaType.APPLICATION_OCTET_STREAM);
        headers.setContentDispositionFormData("attachment", encodedFileName);

        // 返回
        return ResponseEntity.ok()
                .headers(headers)
                .body(pdfService.pdf()).getBody();
    }
}
(Service 实现类)
import com.github.jhonnymertz.wkhtmltopdf.wrapper.Pdf;
import com.github.jhonnymertz.wkhtmltopdf.wrapper.configurations.WrapperConfig;
import com.github.jhonnymertz.wkhtmltopdf.wrapper.objects.SourceType;
import com.github.jhonnymertz.wkhtmltopdf.wrapper.params.Param;
import com.hezy.pojo.PDFDTO;
import org.springframework.beans.factory.annotation.Value;
import org.springframework.stereotype.Service;
import org.thymeleaf.TemplateEngine;
import org.thymeleaf.context.Context;

import javax.annotation.Resource;

@Service
public class PDFServiceImpl implements PDFService {

    @Value("${spring.wkhtmltopdf.exec:}")
    private String wkhtmltopdfPath;

    @Resource
    private TemplateEngine templateEngine;

    @Override
    public byte[] pdf() {
        try {
            // 1.创建上下文
            Context context = new Context();
            WrapperConfig config = new WrapperConfig(wkhtmltopdfPath);

            // 2.创建PDF生成器
            Pdf pdf = new Pdf(config);

            // 3.填充数据
            PDFDTO pdfdto = new PDFDTO("Hello World", "张三", "男", "18");
            context.setVariable("data", pdfdto);

            // 4.指定模板,这里只需指定名称,模板所在路径、模板后缀名都在配置文件中设置过了
            String htmlContent = templateEngine.phpprocess("template", cphpontext);
            pdf.addPage(htmlContent, SourceType.htmlAsString);

            // 5.配置 PDF 文件的通用参数
            pdf.addParam(new Param("--page-size", "A4"),
                    new Param("--margin-top", "15mm"),
                    new Param("--margin-bottom", "15mm"),
                    new Param("--margin-left", "15mm"),
                    new Param("--margin-right", "15mm"),
                    new Param("--enable-local-file-Access"),
                    new Param("--disable-smart-shrinking"),
                    new Param("--print-media-type"),
                    new Param("--encoding", "UTF-8"));

            // 6.生成PDF
            return pdf.getPDF();
        } catch (Exception e) {
            throw new RuntimeException(e);
        }
    }
}
第五步:启动测试
启动项目,调用接口,返回字节数组
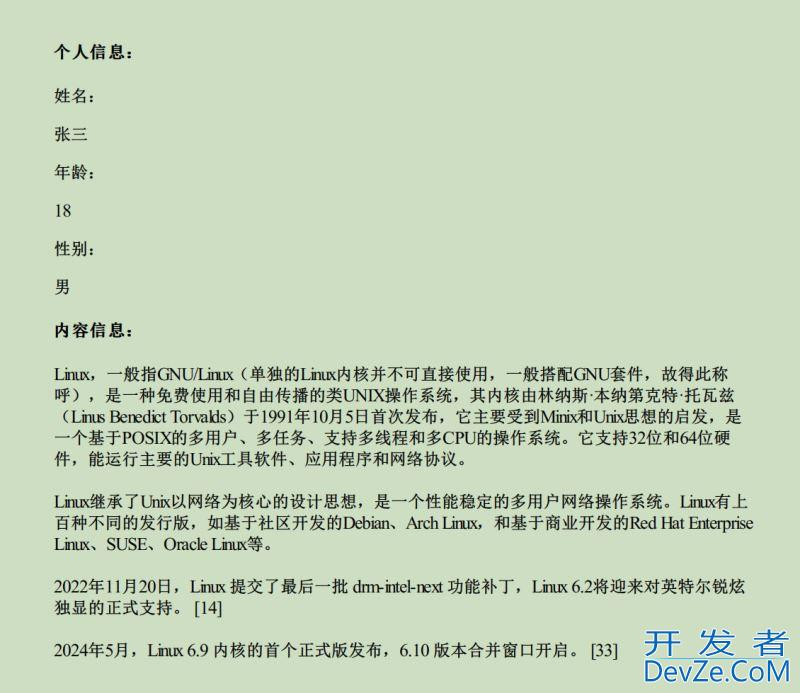
保存为 PDF 文件,打开如下,数据内容已填充到 PDF 文件里

OKKK,现在就是进一步完成细节,一边根据业务需求,完善 PDF 的内容、结构和样式,修改/增加模板文件,一边在后端代码里完善获取数据的逻辑。
总结
本文介绍了在 Java 中如何将数据写入到 PDF 文件中。
以上就是Java将数据写入到PDF文件的操作步骤的详细内容,更多关于Java数据写入PDF的资料请关注编程客栈(www.devze.com)其它相关文章!
 加载中,请稍侯......
精彩评论