目录
- 一、Swagger 简介
- 二、环境准备
- 基础环境
- 三、集成步骤
- 1. 添加 Swagger2 依赖
- 2. 配置 Swagger 核心类
- 3. 解决 Spring Boot 版本兼容问题
- 4. 编写 API 接口并添加 Swagger 注解
- 5. 访问 Swagger UI 文档
- 四、常见问题及解决方案
- 1. 访问 swagger-ui.html 出现 404 错误
- 2. 接口未在 Swagger 文档中显示
- 3. Spring Boot 3.x 兼容问题
一、Swagger 简介
Swagger 是一套用于生成、描述和调用 RESTful API 的规范和工具,主要优势包括:
- 自动生成文档:无需手动编写,通过代码注解自动生成 API 文档。
- 交互式调试:支持在线测试 API 接口,无需依赖 Postman 等工具。
- 版本管理:方便 API 版本迭代和维护。
- 团队协作:前后端开发者可基于同一套文档协作,减少沟通成本。
二、环境准备
基础环境
- JDK:17 及以上(本文基于 Spring Boot 3.x,需兼容 Java 17+)
- Spring Boot 版本:3.5.3(其他 2.6+ 版本可参考,注意版本兼容)
- 开发工具:IntelliJ IDEA
- 依赖管理:Maven
三、集成步骤
1. 添加 Swagger2 依赖
在 pom.XML 中添加 Swagger2 核心依赖(springfox-swagger2 和 springfox-swagger-ui):
<!-- Swagger2 核心依赖 -->
<dependency>
    <groupId>io.springfox</groupId>
    <artifactId>springfox-swagger2</artifactId>
    <version>2.9.2</version&编程客栈gt;
</dependency>
<!-- Swagger2 可视化界面 -->
<dependency>
    <groupId>io.springfox</groupId>
    <artifactId>springfox-swagger-ui</artifactId>
    <version>2.9.2</version>
</dependency>
注意:Spring Boot 2.6+ 及 3.x 版本与 Swagger2(2.9.2)存在一定兼容性问题,需通过后续配置解决(见步骤 3)。
如果不成功可以

2. 配置 Swagger 核心类
创建 SwaggerConfig 配置类,用于自定义 Swagger 文档信息、扫描规则等:
package com.qcby.springboot.config;

import org.springframework.context.annotation.Bean;
import org.springframework.context.annotation.Configuration;
import org.springframework.web.servlet.config.annotation.ResourceHandlerRegistry;
import org.springframework.web.servlet.config.annotation.WebMvcConfigurer;
import springfox.documentation.builders.ApiInfoBuilder;
import springfox.documentation.builders.PathSelectors;
import springfox.documentation.builders.RequestHandlerSelectors;
import springfox.documentation.service.ApiInfo;
import springfox.documentation.service.Contact;
import springfox.documentation.spi.DocumentationType;
import springfox.documentation.spring.web.plugins.Docket;
import springfox.documentation.swagger2.annotations.EnableSwagger2;

@Configuration // 标识为配置类
@EnableSwagger2 // 启用 Swagger2
public class SwaggerConfig implements WebMvcConfigurer {

    /**
     * 配置 Swagger 核心对象 Docket
     */
    @Bean
    public Docket createRestApi() {
        return new Docket(DocumentationType.SWAGGER_2) // 指定 Swagger 版本为 2.x
                .apiInfo(apiInfo()) // 配置 API 文档基本信息
                .select()
                // 配置接口扫描规则:只扫描带有 @ApiOperation 注解的方法
                .apis(Request编程客栈HandlerSelectors.withMethodAnnotation(ApiOperation.class))
                .paths(PathSelectors.any()) // 匹配所有路径
                .build()
                .enable(true); // 是否启用 Swagger(生产环境可设为 false 关闭)
    }

    /**
     * 配置 API 文档页面信息(标题、描述、版本等)
     */
    private ApiInfo apiInfo() {
        return new ApiInfoBuilder()
                .title("Spring Boot API 文档") // 文档标题
                .description("接口文档详情:包含用户管理、数据查询等接口") // 文档描述
                .version("1.0.0") // 接口版本
                .contact(new Contact("开发者", "https://xxx.com", "xxx@example.com")) // 联系人信息
                .license("Apache 2.0") // 许可协议
                .licenseUrl("https://www.apache.org/licenses/LICENSE-2.0") // 许可协议链接
                .build();
    }

    /**
     * 配置静态资源映射(解决 Swagger UI 页面无法访问问题)
     */
    @Override
    public void addResourceHandlers(ResourceHandlerRegistry registry) {
        // 映射 Swagger UI 静态资源
        registry.addResourceHandler("swagger-ui.html")
                .addResourceLocations("classpath:/META-INF/resources/");
        // 映射 webjars 静态资源(Swagger UI 依赖的前端资源)
        registry.addResourceHandler("/webjars/**")
                .addResourceLocations("classpath:/META-INF/resources/webjars/");
        // 映射项目自定义静态资源(如需要)
        registry.addResourceHandler("/**")
                .addResourceLocations("classpath:/static/");
    }
}
3. 解决 Spring Boot 版本兼容问题
Spring Boot 2.6+ 及 3.x 版本默认使用 PathPatternParser 作为路径匹配策略,与 Swagger2 存在冲突,需手动切换为 AntPathMatcher。
在 application.yml 中添加配置:
spring:
  mvc:
    pathmatch:
      matching-strategy: ant_path_matcher # 切换为 Ant 风格路径匹配器
4. 编写 API 接口并添加 Swagger 注解
在 Controller 中使用 Swagger 注解描述接口,生成更详细的文档:
package com.qcby.springboot.controller;

import com.qcby.springboot.entity.Person;
import com.qcby.springboot.service.PersonService;
imXQVVukDHZport io.swagger.annotations.Api;
import io.swagger.annotations.ApiOperation;
import io.swagger.annotations.ApiParam;
import org.springframework.beans.factory.annotation.Autowired;
import org.springframework.stereotype.Controller;
import org.springframework.we编程b.bind.annotation.RequestMapping;
import org.springframework.web.bind.annotation.ResponseBody;

import java.util.List;

@Api(tags = "人员管理接口") // 描述类的作用
@Controller
@RequestMapping("/person")
public class PersonController {

    @Autowired
    private PersonService personService;

    @ApiOperation(value = "查询所有人员", notes = "获取数据库中所有人员信息列表") // 描述方法作用
    @RequestMapping("/findAll")
    @ResponseBody
    public List<Person> findAll() {
        return编程客栈 personService.findAll();
    }

    @ApiOperation(value = "添加人员", notes = "根据传入的人员信息新增一条记录")
    @RequestMapping("/insert")
    @ResponseBody
    public String insert(
            @ApiParam(name = "person", value = "人员实体对象", required = true) // 描述参数
            Person person) {
        int result = personService.insert(person);
        return result > 0 ? "插入成功" : "插入失败";
    }

    @ApiOperation(value = "删除人员", notes = "根据 ID 删除指定人员记录")
    @RequestMapping("/delete")
    @ResponseBody
    public String delete(
            @ApiParam(name = "id", value = "人员 ID", required = true, example = "1")
            Integer id) {
        int result = personService.delete(id);
        return result > 0 ? "删除成功" : "删除失败";
    }
}
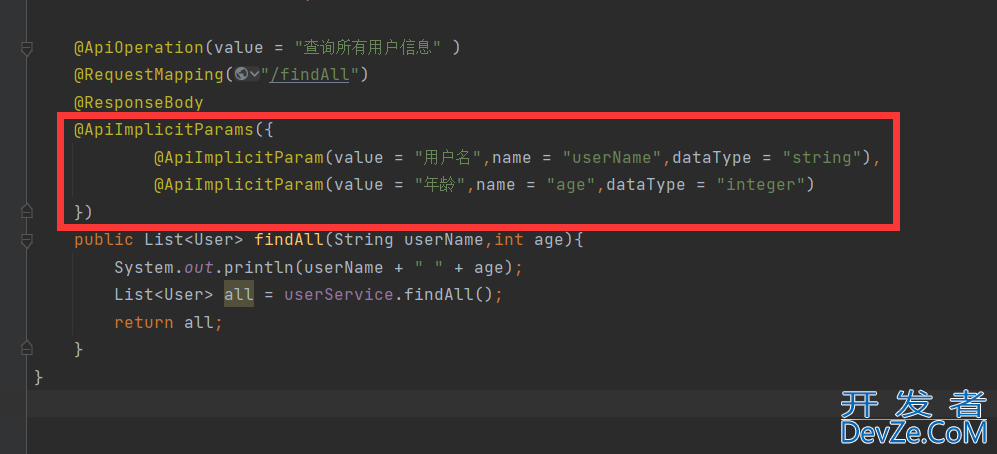
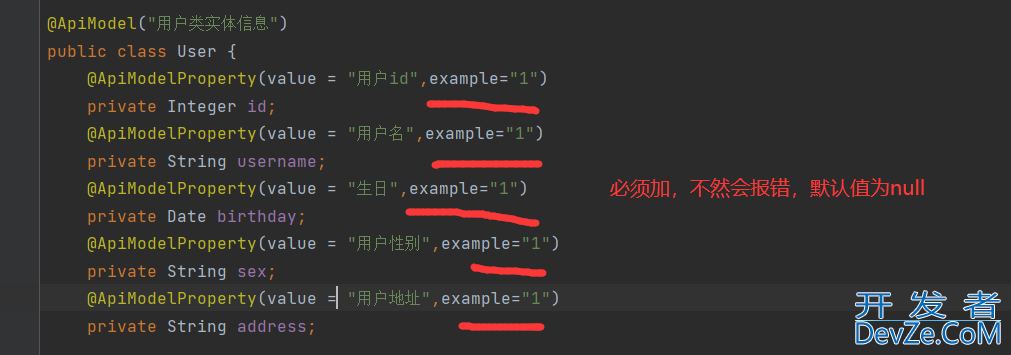
常用 Swagger 注解说明:
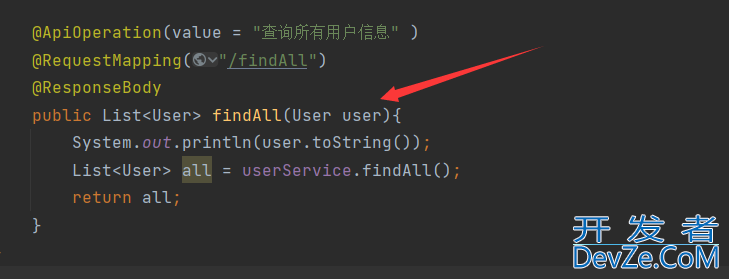
@Api(tags = "..."):描述类 / 控制器的作用。@ApiOperation(value = "...", notes = "..."):描述方法的作用(value 为简短说明,notes 为详细描述)。@ApiParam(...):描述方法参数(名称、说明、是否必填、示例值等)。@ApiModel(...):描述实体类(如Person)。@ApiModelProperty(...):描述实体类字段(如Person的name、age字段)。
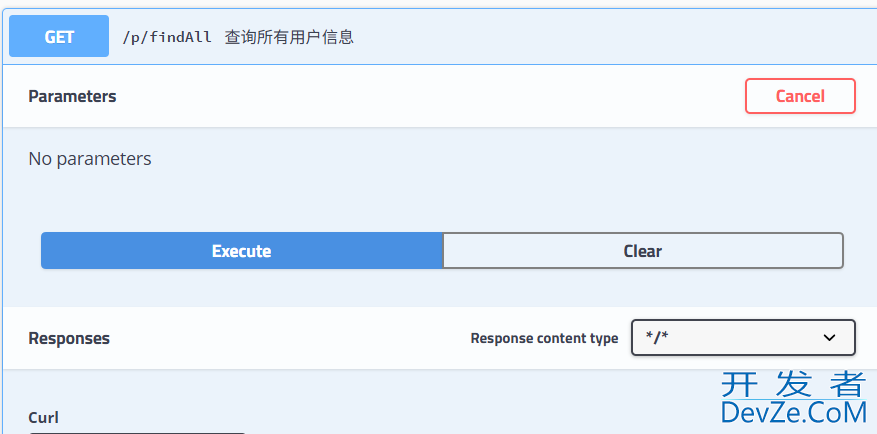
5. 访问 Swagger UI 文档
启动 Spring Boot 项目,访问以下地址:
http://localhost:8080/swagger-ui.html
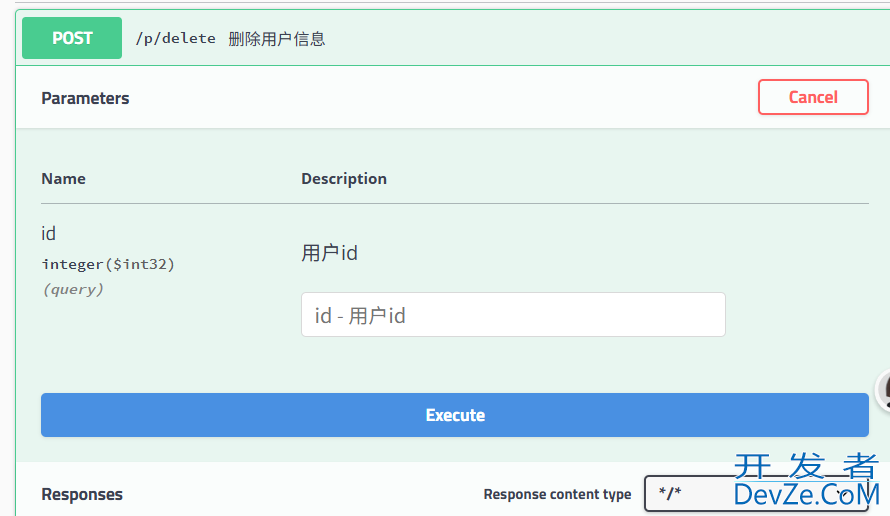
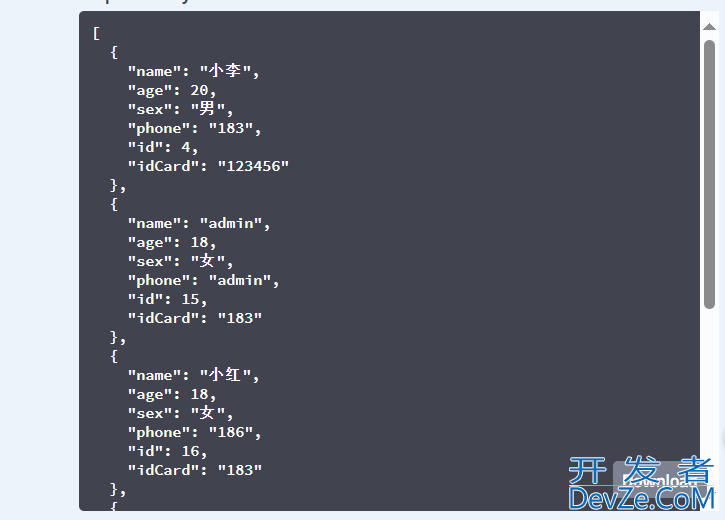
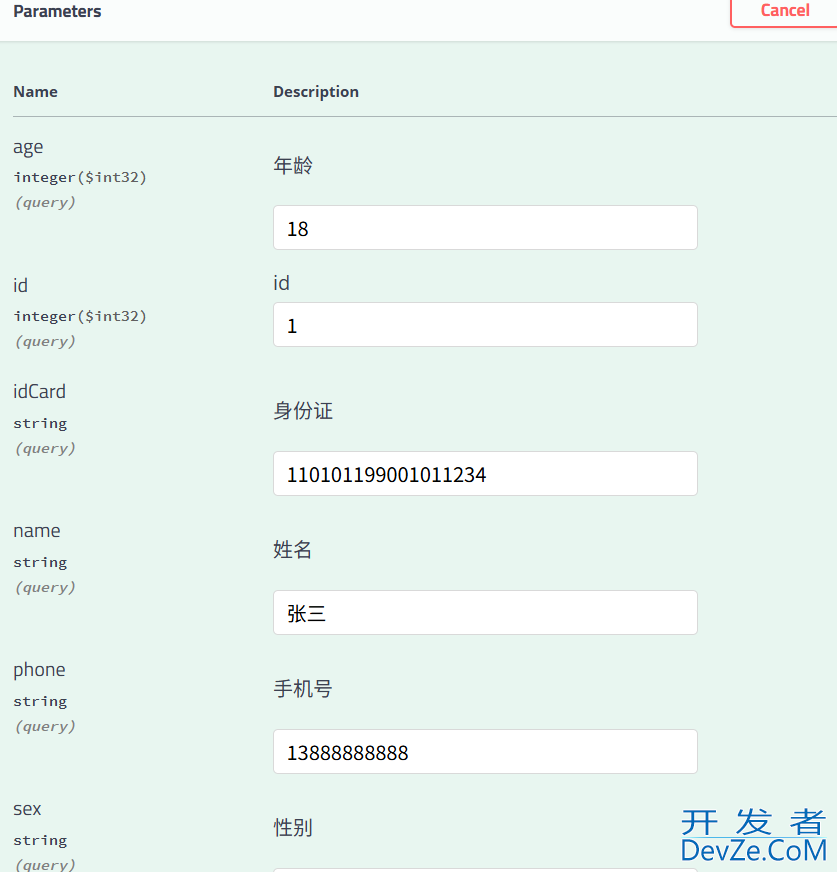
成功访问后,将看到如下界面:
- 左侧:接口列表(按 Controller 分组)。
- 右侧:接口详情(请求参数、响应示例、测试按钮等)。
可直接在页面上输入参数,点击「Try it out」测试接口,无需额外工具。



四、常见问题及解决方案
1. 访问 swagger-ui.html 出现 404 错误
- 原因 1:静态资源映射未配置或错误。解决:检查
SwaggerConfig中的addResourceHandlers方法,确保路径映射正确。 - 原因 2:Spring Boot 版本与 Swagger2 不兼容。解决:确认
mvc.pathmatch.matching-strategy已设置为ant_path_matcher。 - 原因 3:依赖缺失或版本冲突。解决:检查
pom.xml中springfox-swagger2和springfox-swagger-ui版本是否一致(推荐 2.9.2)。
2. 接口未在 Swagger 文档中显示
- 原因 1:
Docket配置的扫描规则过滤了接口。解决:修改apis(RequestHandlerSelectors.withMethodAnnotation(ApiOperation.class))为apis(RequestHandlerSelectors.basePackage("com.qcby.springboot.controller"))(扫描指定包下的所有接口)。 - 原因 2:接口未添加
@ApiOperation注解。解决:在需要显示的方法上添加@ApiOperation注解。
3. Spring Boot 3.x 兼容问题
Swagger2(springfox)对 Spring Boot 3.x 支持有限,推荐使用 OpenAPI 3.0 替代方案(springdoc-openapi):
<!-- 替代 Swagger2 的 OpenAPI 3.0 依赖 -->
<dependency>
    <groupId>org.springdoc</groupId>
    <artifactId>springdoc-openapi-starter-webmvc-ui</artifactId>
    <version>2.2.0</version>
</dependency>
以上就是SpringBoot集合Swagger2构建可视化API文档的完整步骤的详细内容,更多关于SpringBoot Swagger2可视化API文档的资料请关注编程客栈(www.devze.com)其它相关文章!



 加载中,请稍侯......
精彩评论